|
Navigation: Reference Manual > The PRISM Modules > Concessions > Adding an Agreement |
Send comments on this topic.
|
|
Navigation: Reference Manual > The PRISM Modules > Concessions > Adding an Agreement |
Send comments on this topic.
|
Adding an agreement consists of several steps. PRISM will guide you step by step through the process. The process begins with adding the agreement profile information. Adding concessions prime contractors to the agreement is next followed by adding concession subcontractors. Finally, the entered data is confirmed and the agreement is in place.
Adding a Concessions Agreement
1.From the Big Hamburger Menu menu, click "Add an Agreement"
2.From the add screen, complete the four sections:
(1).gif) Agreement Info
Agreement Info
Prime(s)
Sub(s)
Agreement Details
3.Click the Save button at the bottom of the screen.
Note: After entering the Agreement Number, click the green check mark to verify that this number is not being used already. If it is, PRISM will pre-populate the remaining fields with known information about the agreement.
Note: Agreement Details contains several list to select from. These lists are populated by configured items.
Agreement Info Add Screen
.png)
Adding Prime Concessionaires
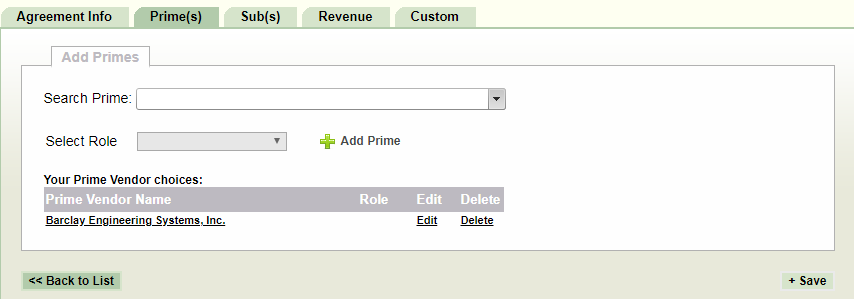
1.Click "Continue to Primes"
2.Search for the prime using the search bar provided.
3.Choose the prime from the list.
4.Select the Role from the drop-down list.
5.Click "+ Save" .
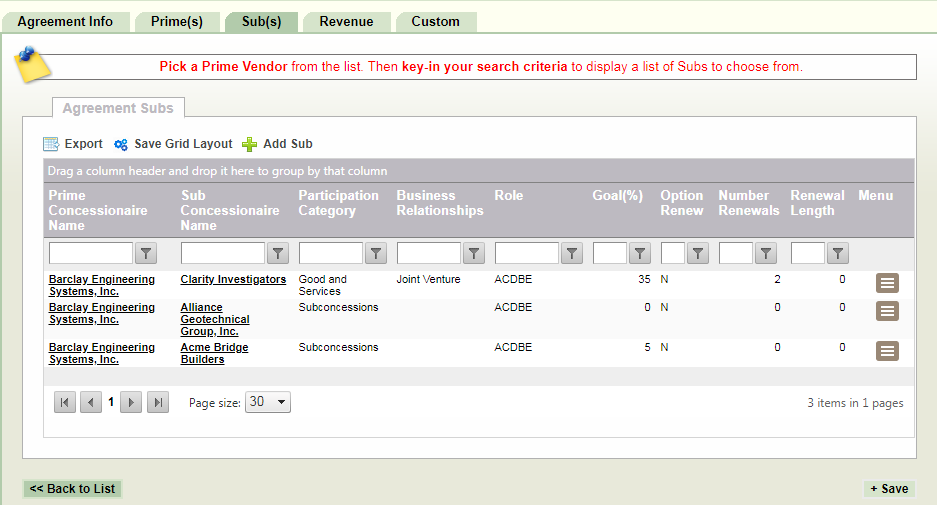
Adding Sub Concessionaires
Sub(s) Tab
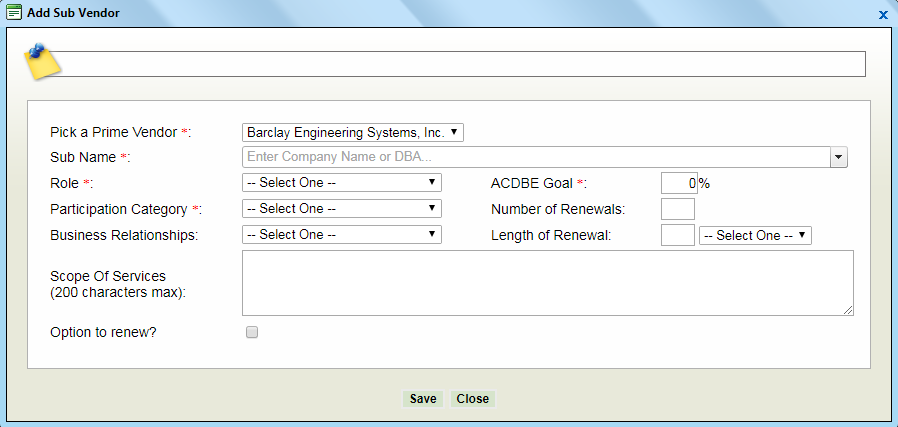
Sub(s) pop-up.
1.Navigate to the Sub(s) tab.
2.Use the "Add Sub" button
3.Enter the sub information into the sub(s) pop-up:
Role
Participation Category
Business Relationships
ACDBE Goal
Click "Add" (sub is added to the list, repeat for each sub)
Click Continue to Confirm
Confirm Concession Agreement
1.Review the information
2.Click Save
.png)
|
PRISM Compliance Management - Copyright © 2026 Early Morning Software, Inc. |